Tag Archives: food

Bowling for Cupcakes!

Image

Bowling for Cupcakes!

I will take any excuse to bake. The other day my boyfriend had a rugby game and I decided to bring some cupcakes for the players after the game. I made light chocolate cupcakes with chocolate butter cream. Simple but, hopefully, good!

Later that week some friends went bowling and i used some leftover cupcakes to make some bowling themed cupcakes! I use fondant and Wilton Coloring to make little pins and bowling balls. I did not mesh the color in perfectly for the balls to create the swirly, marbled effect of real bowling balls. I was pretty proud! heh heh heh!

IMG_4009

Final Cake!

Image

Final Cake!

Sorry for the lack of posting. I have been pretty busy as I want to make the most of my time left in HK 😦

A couple of weeks ago i finished the first course in the Wilton Decorating Series. Here is my final cake!

Here are the final cakes for the rest of the class! Which one do you like?

IMG_3902

Cake Pops!….my nemesis

Image

So, I have a little confession when it comes to cake pops. I have tried to make them a couple of times and each time they never turn out QUITE the way I’d like.

I’m not going to “blame the tools” but there is a lack in availability of many baking ingredients in Hong Kong. To make proper cake pops you need candy coat buttons – which are readily available in most countries, but exceedingly hard to get your hands on here. However, I substituted white and dark chocolate hoping they would have the same effect.

Ingredients:

– 1 basic cake
– 1 cup of icing – butter cream is best
– candy coating
– cake decorations

Method:

1. Once you have your cake let it cool totally. Cut it in to four quarters. To break the cake in to crumbs its easiest to rub two of the quarters together.
IMG_3522

2. Mix in your icing. Do this slowly and be sure to mix up the mixture to achieve the best consistency for your balls. You don’t want them to be too mushy/soft. However, you need enough icing to ensure the balls stay together.
IMG_3519

3. Using an ice cream scooper or your hands form cake balls of any size you like. Place them on a baking sheet lined with parchment paper or wax paper.

4. Place the baking sheet in the freezer for about 15 minutes and then the fridge till they are ready to be dipped and decorated.

5. While the balls are setting you are ready to prepare your decorations. At this point melt you candy coats/chocolate. If you are using chocolate be sure to use a double boiler or microwave.
IMG_3520

I used white chocolate and colored it pink with food coloring to try and achieve the “candy” effect.

6. When ready, stick lollipop/satay sticks about half way in to each ball before decorating it.

IMG_3524

And the rest is up to you…!!!!

IMG_3526 IMG_3532

Chocolate Cloud Cookies *A MUST TRY*

Image

Chocolate Cloud Cookies  *A MUST TRY*

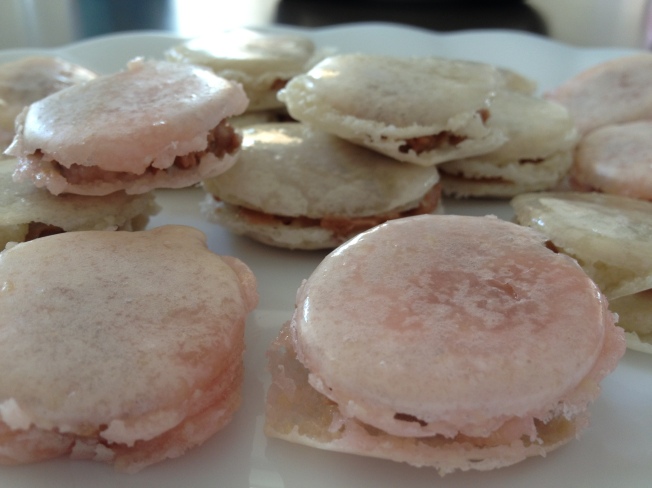
My mom went on vacation to Singapore last week and came home raving about the amazing cakes and baked goods available there. I love, love, love Hong Kong but it really has a lack of high-quality (and variety of) baked goods.

I have always heard of “cloud” cakes, cookies and cupcakes. I always kind of avoided them because I like a good, dense, gooey-ness. Usually light, fluffy desserts require less chocolates – BIG no, no for me.

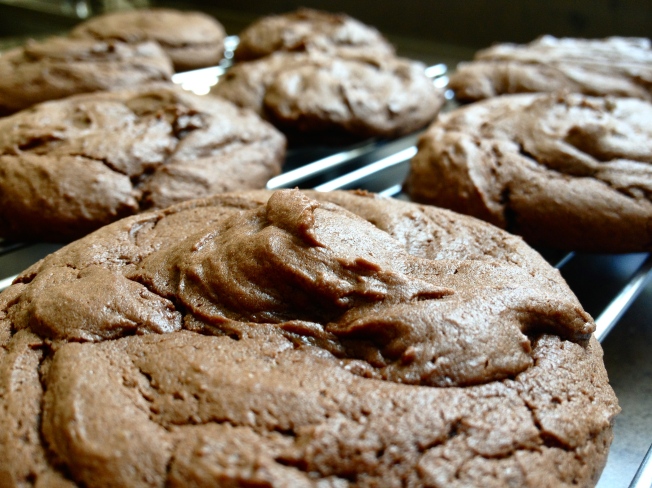
The best part about these cookies is they are super easy to make and are RELATIVELY low cal. The recipe calls for UNSWEETENED chocolate…which may seem crazy but honestly makes the cookies in the end.

Ingredients:

1/2 cup whole milk
1/2 teaspoon baking soda
1 1/2 cups all-purpose flour
1 teaspoon baking powder
1 cup packed dark brown sugar
1/2 cup (1 stick) butter, at room temperature

1 large egg
1 teaspoon vanilla extract
2 ounces unsweetened chocolate, melted

Method:

1. Preheat the oven to 350 degrees F. Line a baking sheet with parchment paper (or use nonstick cooking spray). In a medium bowl, whisk together the milk and baking soda until all lumps are dissolved. Set aside.

2. In a large bowl, whisk together the flour and baking powder. Set aside.

3. Place the sugar and butter in the bowl of a stand mixer fitted with the paddle attachment and beat on medium speed until creamy. Reduce the speed to low and add the egg and vanilla

4. Add the melted chocolate and mix until smooth. Add half of the flour mixture and blend. Slowly incorporate the milk mixture. Add the second half of the flour mixture and blend until smooth.

5. Drop the dough by heaping teaspoonfuls onto the baking sheet, leaving at least 1 inch between cookies. Bake for 8 to 10 minutes, until the cookies spring back when touched. Make the frosting while the cookies bake. Remove the cookies from the oven and cool for 1 minute.

Bon apetite! 🙂

Chocolate and Peanut Butter Truffles

Image

Chocolate and Peanut Butter Truffles

So fathers day was last weekend and I was pretty stumped on what to get/do for my dad. We always have a lot of chocolate around the house….and peanut butter. So these truffles were the perfect gift.

Truffles are great! They are so easy to make and super QUICK to make. You can also be very versatile with your decorations. There are many great wrapping ideas on the internet. One of my favorites would be a pretty box with colorful tissue paper and ribbon.

Ingredients:

– 10 oz. semi sweet chocolate
– 8 oz. cream cheese
– 2 tablespoons peanut butter

* An optional addition would be rum. My dad loves rum balls. This makes the recipe super smooth.

Method:

1. Melt chocolate in a double boiler
2. Mix cream cheese for 2 minutes or until smooth
3. Mix chocolate and peanut butter together and pour over the cream cheese. Mix together thoroughly.
4. Spread mixture in to a pan. Place in a fridge for a couple of hours.
5. Afterwards, use an ice cream scoop or spoon to make small balls of truffles. Then roll them in whatever toppings you’d like.

I used almond bits, Cocoa powder and chocolate sprinkles. Some other popular toppings would be icing sugar or peanuts.

🙂

Peppermint Chocolate Bark

Image

Peppermint Chocolate Bark

I had some white chocolate (super sweet) and 95% dark chocolate (pretty bitter) sitting around at home. So I figured the best way to make the best of both of them was to mix them! ….and add mint of course. Cuse mint is always amazing.

Ingredients:

– 2 bars white chocolate
– 2 bars dark chocolate
– 2 tablespoons mint flavoring and (optional) green coloring
– mint candies of some sort (I used junior mints, but Andes mints or After eights could always be substituted)
– Chocolate chips (optional)

Method:

1. Melt White chocolate in a double boiler. Once melted mix in mint flavoring and green coloring.

2. Spread mixture in to a pan lined with parchment paper. Let it set in the fridge for 15 minutes.

3. Meanwhile, melt dark chocolate in a double boiler

4. Chop up mints

5. Pour the dark chocolate on top of the white chocolate. Drop chopped mints on top.

6. Leave to set in the fridge for 2 hours. Chop in to jagged pieces.

Peri Peri Roasted Chickpeas

Image

Peri Peri Roasted Chickpeas

I’ve been trying to eat healthier this summer as my diet definitely suffers during the school year. One of my major problems is snacking! Especially when watching TV. I had heard quite a bit about roasted chickpeas and how much of a great snack alternative they are. Beans are full of protein, fiber and are relatively low cal compared to other snack foods.

They are also more substantial and tasty than say, celery.

Ingredients:

– 1 can chickpeas
– 1 tablespoon cumin
– 1 tablespoon paprika
– pinch of salt
– 1 tablespoon onion powder

Method:

1. Rinse and drain chickpeas for up to 12 hours

2. Pre-heat oven to 200 degrees Celsius

3. Coat chickpeas in spice mixture and spread out evenly on baking sheet

4. Cook for 45 minutes or until golden brown

Gluten Free & Vegan Kale Felafals

Standard

Another savory post!

The other night my mom and I decided to have a Mediterranean night at home. The first thing that popped in to my mind was Felafals! So we feasted on Felafals, Haloumi and a veggie cous cous.


However here is my recipe for homemade, HEALTHY Felafals from scratch! They are Gluten free and vegan, so fit for anyone!

Ingredients:

– 1 Can chickpeas

– 1 bunch of Kale

– Cumin, Cayenne pepper (seasoning),  Tumeric

– 2 cloves garlic

– some chopped onion

This actually has the easiest method – mash everything together! If you have a food processor, use that with the chickpeas and Kale first. However, a food processor is not necessary. I just used a mortar and pestle. 

If you do not use a food processor the Felafels come out most moist than normal – still a good idea to eat them with some Hummus though 😉

Image


Image

Tin Can Cakettes!

Image

IMG_3213


These cakes were a birthday present to one of my best friends. I was really excited about trying out this baking technique! I love it because it gives even MORE surface area for icing (yum, yuummmmm!).

Sadly, I misplaced my icing tips which make the finished product look somewhat…unprofessional. I tried to hide it behind my fondant roses! 😉

Ingredients

For the cake:

225g/8oz plain flour

350g/12½oz caster sugar

85g/3oz cocoa powder

1½ tsp baking powder

1½ tsp bicarbonate of soda

2 free-range eggs

250ml/9fl oz milk

125ml/4½fl oz vegetable oil

2 tsp vanilla extract

250ml/9fl oz boiling water

Butter Cream Icing:

– Half a stick of butter

– 1 1/2 cups icing sugar

– tablespoon of milk

– tablespoon vanilla

– 5 drops purple coloring (optional)


Method:

1. Preheat the oven to 180C/350F/Gas 4. Grease and line two 20cm/8in sandwich tins.

2. For the cake, place all of the cake ingredients, except the boiling water, into a large mixing bowl. Using a wooden spoon, or electric whisk, beat the mixture until smooth and well combined.

3. Add the boiling water to the mixture, a little at a time, until smooth. (The cake mixture will now be very liquid.)

4. Separate the cake mixture in to emptied and clean tin cans. Only fill them half way up with batter.

5. Cook for about 30 minutes or until cake tester comes out clean.

6. Tops of the cake will probably need to be cut off before icing to ensure a flat surface.

IMG_3210


Strawberry and Vanilla Macarons

Image

Strawberry and Vanilla Macarons

This was my first attempt at making Macarons. They seem to be all the rage right now. I was pretty disappointed as some of the Macarons you see in shop windows look like art!

However, I cut myself some slack as I was missing a few of the utensils required. One of my biggest problems was not owning a Silicon Gel Mat. This meant that the Macarons stuck to the baking sheet a lot. I tried to use baking paper instead but it was little help.

Macaron Recipe:

3 egg whites

1/4 cup white sugar

1 2/3 cups confectioners’ sugar

1 cup finely ground almonds

1. Line a baking sheet with a silicone baking mat.
Beat egg whites in the bowl of a stand mixer fitted with a whisk attachment until whites are foamy; beat in white sugar and continue beating until egg whites are glossy, fluffy, and hold soft peaks. Sift confectioners’ sugar and ground almonds in a separate bowl and quickly fold the almond mixture into the egg whites, about 30 strokes.

2. Spoon a small amount of batter into a plastic bag with a small corner cut off and pipe a test disk of batter, about 1 1/2 inches in diameter, onto prepared baking sheet. If the disk of batter holds a peak instead of flattening immediately, gently fold the batter a few more times and retest.

3. When batter is mixed enough to flatten immediately into an even disk, spoon into a pastry bag fitted with a plain round tip. Pipe the batter onto the baking sheet in rounds, leaving space between the disks. Let the piped cookies stand out at room temperature until they form a hard skin on top, about 1 hour.

4. Preheat oven to 285 degrees F (140 degrees C).
Bake cookies until set but not browned, about 10 minutes; let cookies cool completely before filling.

– I added 2 tablespoons of strawberry flavoring to half of my mixture